Travel Photographers: DON'T Settle for Snapshots (VIDEO)

Even if travel photography isn’t your thing there’s sure to be trip on the horizon, whether it’s for business, a weekend excursion to the beach, or a long-awaited summer vacation abroad. Today’s comprehensive tutorial covers everything you need to know for documenting your journey, whether you’re a beginner with simple gear or an aspiring pro.

We’re always surprised when experts in other popular genres return from a trip with images that could be best described as snapshots, even though their usual work is so impressive. The video below from Canadian photographer/video producer Lizzie Peirce provides 10 straightforward tips for leveling up your travel photography game.

In this behind-the-scenes episode you’ll join Pierce in Toronto while she dives into a wide variety of topics from the best times of day to shoot, essential gear, and the importance doing some research to familiarize yourself with the culture and identify key areas of interest before hitting hit the road.

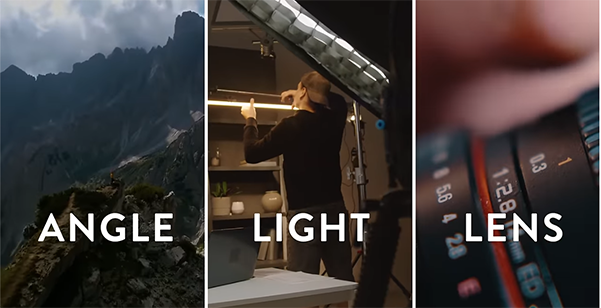
There’s also a thoughtful discussion of key shooting techniques, and these include careful composition, lighting and reflections, and tips for choosing unique vantage points and camera angles that deliver an uncommon look when shooting familiar destinations. And like with all forms of photography, a respect for the environment and local people should be included on your list.

Peirce recommends arising early and being on site at dawn or staying out the until the sun drops below the horizon for two primary reasons. One is the beautiful soft light of Golden hour, and the other is that monuments and other popular sites tend to be less cluttered with tourists at these times than they are in the middle of the day.

Another way to document a trip in a unique way is to immerse yourself in the culture by venturing off the well-beaten path, speaking with a few “homies” about local history and even requesting permission for an environmental portrait that helps you tell a visual story.

It also helps to patronize restaurants and shops that don’t appear in your travel guide— otherwise they be jam-packed with tourists like you. The remainder of this 14-minute lesson is devoted to a discussion of photo equipment and a demonstration of several interesting shooting techniques that will deliver uncommon images that no one will confuse with quick-and-dirty snapshots.

Once the video concludes take a look at Peirce’s instructional YouTube channel and browse through the many how-videos that are available.

We also recommend watching a tutorial we featured recently with one of our favorite instructors who explains how to take advantage of color theory basics with real-world examples and practical techniques that will boost the impact of every outdoor photograph you shoot.

How to Fix Underexposed Night Photos in Lightroom (VIDEO)

Nighttime photography can be a lot of fun because it provides numerous opportunities to capture compelling images in the field or on the street. Familiar scenes that may appear boring during the day are transformed into magical tableaus once the sun drops below the horizon.

But here’s the rub: the same neon signs, streetlamps, and brightly-lit windows that everyone finds so captivating can also make it extremely difficult to determine a balanced exposure. And most of the time this means images that look far darker than what you saw through the viewfinder.

But all is not lost because the following video from French-born Serge Ramelli describes “how to retouch an underexposed photo like a pro.” He’s is a noteworthy cityscape photographer now living in the U.S. whose sought-after images are displayed in over 120 galleries across the globe.  

Ramelli summarizes today’s eye-opening episode like this: “I’ll provide step-by-step instructions for transforming a severely underexposed photo into a stunning gallery-worthy image.” Along the way you’ll learn his preferred methods for correcting exposure, perfecting white balance, and mastering dodge and burn.

Ramelli also demonstrates his strategy for applying sharpening and noise reduction to images that are overly dark. He covers all these topics and more in barely nine minutes. The example he uses is a well-composed street slot with a curving cobblestone road that effectively guides you through the glittering village.

The problem is an exposure mistake that makes all the enticing details difficult or impossible to see—thereby spoiling the unprocessed shot. If you want a one-click solution, simply grab Ramelli’s free Lightroom AI presets using a link beneath the video. The point of this lesson, however, is teaching you how to rehabilitate an image yourself so that you understand the necessary adjustments and enhancements that are involved.

Ramelli begins by adjusting the black points in the photo before boosting the whites to “reveal the photo.” Then he uses simple slides to modify white balance, color intensity, and other key variables in a manner that photographers of all skill levels can handle with ease. A few simple masks for local enhancements also factor into the equation.

A quick glance at Ramelli’s before/after examples confirms the spectacular results you can expect by following his straightforward advice. Be sure to take a close look at his popular YouTube channel and explore the many how-to videos you find.

And don’t miss a tutorial we featured with another post-processing expert who demonstrates a simple-but-obscure masking trick that many photographers overlook that takes barely five minutes to learn. You can use it in Lightroom, Photoshop, and Adobe Camera Raw.

Creative Crops Can Transform Your Photos: Here's How (VIDEO)

Is image cropping just a technical fix, or a creative tool that can completely transform your photography? According to pro Ejaz Khan, the latter is the correct answer, and he demonstrates why and how in the 10 minute tutorial below.

Khan grew up immersed in filmmaking and developed a love for storytelling that fueled his passion for photography. The goal of his popular how-to videos is to “help you capture stunning photos effortlessly by simplifying complex techniques into actionable steps.” The task of creative cropping isn’t exactly complex, but it’s one sure way to leave viewers craving more.

Today’s episode is all about this using this practical skill to enhance images with an artistic flair. Khan explains the concept like this: “I’ll show you how image cropping is more than just trimming edges, and how it enables you to unlock the full emotion, power, and presence within the frame.” He promises that by following his advice you’ll be able to quickly turn a decent image into one that’s “unforgettable.”

Put another way, with the techniques you’ll learn in the next 10 minutes, “your cropped images don’t just look better, they feel better too.” Bottom line: If you’ve ever looked at one of your images and thought something was missing, there’s a good chance that a lack of thoughtful cropping is the key element you overlooked.

Khan’s straightforward tips are illustrated by a selection of photos that can be greatly improved with different types of crops, and they’re appropriate for a broad range of genres from landscapes, portraits, and action shots, to nature and wildlife imagery. With a bit of practice, these compelling  styles will quickly become second nature whether you’re “cropping in the camera” or during post processing.

Khan demonstrates how even small changes to the frame can elicit a big emotional response from viewers, and why it’s helpful to leave space in your crop for flexibility of mood. In other situations the goal is creating photos with a sense of power, and one way to do that is getting in tight which will accentuate a key subject and eliminate distracting elements in the background or surrounding areas. Other times, the goal may be enhancing depth, clarity, and texture.

The overall takeaway is this: “Don’t just frame what you see, use image cropping to shape what your audience feels.” Once you’re done watching, heady over to Khan’s instructional YouTube channel where there are many more tips and tricks for improving your skills.

And don’t miss our recent tutorial with one of our favorite instructors who demonstrates why an understanding of color theory and practical ways to use it is also essential for creating photographs with maximum impact.

Shoot Pixel-Perfect Pet Photos with 5 Easy Tips (VIDEO)

If you’re a proud pet owner let’s forget about your photographic specialty for the next 10 minutes, because we all love capturing memorable images of our furry friends. Today’s tutorial from the B&H Photo Video YouTube channel demonstrates five must-know tips for getting the job done to perfection

In honor of National Adopt a Shelter Pet Day instructor Gabriel Richards took his crew to a new state-of-the-art animal care facility in New York to take portraits of some of their senior and long-term residents to help them get adopted. He demonstrates a variety of helpful methods for getting a pet’s attention, finding flattering poses, what kind of lighting to use, and more.

Richards reveals his foolproof techniques in the context of photographing dogs, but everything you’ll learn will work wonders for cat owners too. There are some special “accessories” you’ll want to have handy for tackling this assignment; namely, your pets favorite treats and a few toys.

Most pets are very motivated by food, and Richards explains why small meat-based treats are the best way to go for capturing a subject’s attention and sustaining their interest when facing the camera. And a cuddly toy will help keep a dog or cat comfortable and calm in this unfamiliar and potentially stressful situation.

An unobtrusive background is also essential whether you’re shooting outdoors or with a makeshift “studio” at home. In either case its “important to keep things simple because, after all, your pet is the star of the show.” Richards chose a simple bright-colored seamless backdrop for his on-location shoot.

You can take the same approach when shooting at home, but even a blank white wall will do just fine. Richards demonstrates how to things clean and simple when shooting outdoors, and one way to do that is by choosing a wide aperture to throw background clutter out of focus.

Richards moves on to several tips for encouraging your pet to strike variety of interesting poses. He provides flattering examples for candid shots, formal portraits with the subject gazing directly into the lens, and photos of action like your pet chasing a ball.

At this point you’re only halfway through the video and as the lesson proceeds you’ll discover valuable gear recommendations, tips for getting the light exactly right, and details on other key considerations. There are several links in the description beneath the video for watching more how-to videos on pet and dog photography.

There’s much more to learn on a wide variety of photo skills on the B&H Photo Video YouTube channel.

And speaking of animal photography techniques, be sure to check out our recent tutorial from a British wildlife expert who demonstrates how to capture perfectly focused bird photos when tree branches obscure your subject.

Don't Miss this Simple Oft-Ignored Photo Masking Trick (VIDEO)

It’s not often that a helpful post-processing trick slips by Adobe impresario Matt Kloskowksi, and there’s a good chance that you may have missed it too. This technique isn’t exactly new but it’s quick, easy, very effective, and it’s takes barely five minutes to learn.

Matt says Photoshop and Lightroom can be way too complicated and “my personal mission is to create videos that simplify the process of shooting great photos and editing them for the results you’ve always wanted.” Speaking of masking, don’t forget to download Matt’s free Lightroom and Photoshop masking presets with a link in the description beneath the video.

Today’s lesson begins in the Masking panel within Lightroom’s Develop module, but it works the same in Adobe Camera Raw (ACR). Matt acknowledges that this isn’t a trick you’ll employ for all of the photos you edit, and he explains why it’s specifically useful when employing any tools that automatically create masks for you, or when presets are part of your process.

Matt uses the new auto landscape masks as his first example before moving on to people masks and others applications. His overview of today’s quick tip goes like this: “Let’s say you create a bunch of masks. What’s the software is going to do is create all possible masks for the type of image it detects.”

This doesn’t mean you’ll actually need every mask in the list which, in the case of landscapes, includes choices like Sky, Vegetation, Architecture, Artificial Ground, and others. But look closely and you’ll see a small exclamation point next some of the options in the dropdown list. This symbol identifies elements (and corresponding masks) that don’t exist for the specific image at hand.

You may think that leaving these unnecessary masks where they are doesn’t hurt anything, but Matt explains that they should be removed because they can actually slow down the editing process. The solution is following his simple instructions to select an option called Delete All Empty Masks from a pop-out menu.

Doing so is a great way “to keep things nice-and-tidy in your masking panel.” There are many more simple tips and techniques like this one on Matt’s instructional YouTube channel that has 128K interested subscribers.

And don’t miss an earlier tutorial we featured with five essential image-editing techniques that one of our favorite instructors says every landscape photographer must understand. There’s also an Editing Workflow Guide that you can download for FREE!

COLOR THEORY: Practical Real-World Tips for Better Photos (VIDEO)

Color theory is a universal language used by artists, filmmakers, designers, and well-informed photographers to imbue creations with their unique vision. The video below from expert Paul Kay explains why this essential concept should be top of mind whenever there’s a camera in your hand.

Kay is a successful travel photographer, popular instructor, and Sony Digital Imaging Ambassador based in Tokyo. He describes the topic of today’s important episode like this: “Learning how to use color theory in photography is such a great unlock for your compositional abilities.” In other words, it’s a fundamental consideration.

In barely 10 minutes Kay emphasizes several key color concepts you need to understand, and then he provides helpful graphics and real-word images to illustrate how to put your new-found knowledge to work. Along the way you’ll learn how the proper use of color “will help accentuate a subject, divert attention, and (my personal favorite) how to change the mood of a photo.”

Kay begins with an overview of the Color Wheel within which every color is represented. The trick when using this visual aid is understanding the manner in which colors are arranged. He explains that colors that oppose one another on the wheel are referred to as complimentary colors because “when they sit next to each other in an image they provide the highest amount of visual contrast. Because of that they work.”

Conversely, analogous colors sit together on the color wheel and are fanned out to display to display one main hue along with various gradations as you move to the left and the right. With the basics out of the way, Kay pulls up his first example—a stunning landscape scene captured in Kyoto with the sun setting behind a prominent pagoda and fading clouds overhead.

This shot is a perfect example of using color to accentuate a key subject with complimentary colors because if you time things right you can display beautiful blue and orange tones. Kay says, “I’m using orange as a brighter luminosity to pop out the pagoda and show viewers that it’s the star of my composition.”

As the lesson proceeds you’ll see different types of compelling photographs that rely upon color theory techniques to create magical effects that simply can’t be ignored. So pay close attention, change the manner in which you view the world around you, and take advantage of Kay’s practical advice the next time you’re out in the field.

There’s much more to see and learn on Kay’s instructional YouTube channel so be sure to pay a visit when you have time to explore.

On a related note, don’t miss an earlier tutorial we featured with a post-processing expert who demonstrates a straightforward Lightroom white-balance technique for creating photographs with “color separation” between your subject and the background of a scene.

Unistellar Odyssey Pro Smart Telescope Review: Fast, Fun, Easy, and Expensive

A split image: left side shows a black telescope on a tripod in front of green foliage; right side displays a detailed close-up photo of the Moon with cratered surface, labeled with coordinates and date.

The Odyssey Pro Smart Telescope is among Unistellar’s smallest and lightest reflector-based systems. It makes viewing and capturing the night sky as simple as clicking a few buttons on your smartphone or tablet. It is small, light, easy to travel with, and it has an actual viewfinder (powered by Nikon optics) allowing users to start viewing the night sky in less than five minutes.

[Read More]

Landscape Shooters: Do This with Boring Blue Sky Photos (VIDED)

Here’s a common scenario that many of us have faced on occasion: You travel to a distant location that you’ll likely never visit again and get totally skunked by the weather despite the numerous opportunities that abound. We not talking about rain or storms, but rather boring blue skies every single day.

Fortunately, there’s a straightforward post processing trick that will enable Lightroom users of all skill levels to transform these ho-hum images into attention-grabbing winners with the WOW factor. And that’s what instructor Nickolas Warner explains how to do in the next 10 minutes.

Warner is a globe-trotting pro who specializes in landscape and travel photography. He’s also a respected educator whose YouTube channel is designed to help others up their game in the field and behind the computer by gaining insight into how he shoots and processes his images in Photoshop and Lightroom.

Today’s example is a well-composed image captured at Sapat Beach in faraway Pakistan on one of those days that everyone loves—except for photographers, i.e. there’s nary a cloud in sight. He jumps into Lightroom’s Develop module by pressing the keyboard shortcut “D.” He next walks you through several preliminary adjustments that will help retrieve a bit of dynamic range.

Warner chooses the Adobe Neutral profile that he says is a good choice for images shot against the sun. Then he increases overall exposure, opens the shadows and blacks, and takes down those highlights. He also modifies contrast and brings up vibrance to recapture some of the color that was muted due to the Neutral profile in use.

At this point his base image is ready to go as soon as he eliminates a few distracting dust spots. Now it’s time for the meat of the tutorial—namely dealing with the bland sky—and Warner devotes the remainder of the video to demonstrating the simple step-by-step process. Compare his before/after images and you’ll be very impressed.

When the video concludes head over to Warner’s popular YouTube channel where there are many more interesting photo adventures and how-to videos to be found.

We also encourage you to watch the tutorial we featured with an accomplished Australian pro who reveals five essential post-processing tips that he says every landscape photographer should learn immediately.

Bird Photo Focus Tips for Shooting Through Branches (VIDEO)

We all love photographing birds, whether we’re shooting a local reserve, a nearby park, or even in the comfort of our backyard. Unfortunately, there’s a common focusing problem that occurs when the subject is perched among tree branches that can easily fool a camera’s AF system.

In the video below from expert Paul Miguel you’ll learn an effective solution for capturing sharp bird photos when distracting elements like branches or foliage make this difficult. He’s a professional wildlife photographer based in the UK, specializing in birds, with a popular YouTube channel dedicated to simplifying the process for beginner and novice shooters .

Miguel explains why a camera’s Focus-Tracking mode doesn’t get the job done, and why he recommends choosing the Spot Focus mode instead and how it can be used to pick out a bird through the branches. He admits that that this approach may fail when the cluster of branches is really thick, in which case you may think it’s time to select Manual focus instead.

But not so quick, because what if the bird suddenly moves to a less obstructed position where autofocus can be really helpful for nailing the shot? This is the reason for Miguel’s “hybrid” focusing technique that he demonstrates in the next seven minutes.

Miguel explains the process like this: “I temporarily lock the autofocus, grab the focus ring on my lens, and focus manually, and this works well if you’re using back-button focus.” Then if the bird moves to a less-cluttered spot it’s a simple matter to reengage autofocus and fire away.

As you’ll see, there are a few ways you can configure the camera appropriately depending upon your preferred method of shooting. Miguel urges you to be willing to experiment and accept the fact that there may be a few frustrating failed attempts, because there’s no doubt that these situations can be a hit-or-miss affair.

That said, your odds of success will increase dramatically by taking the aforementioned hybrid approach and understanding the specific details you’ll learn as this episode unfolds. Then head over to Miguel’s instructional YouTube channel and consider joining his 43K enthusiastic subscribers.

And be sure not to miss the earlier tutorial we featured with an Australian pro who insists that shutter speed is your camera’s most power exposure option for capturing unique photographs with a creative flair.