![]()
Light Lens Lab has shared a new behind-the-scenes look at its ambitious project to create film emulsions using its brand new proprietary machinery and emulsion process.
![]()
Light Lens Lab has shared a new behind-the-scenes look at its ambitious project to create film emulsions using its brand new proprietary machinery and emulsion process.

Sigma America announced that it will increase prices in the United States beginning June 2 due to tariffs.
![]()
Once an industry leader in the photography website space, Zenfolio has had a rough time in recent years. Photographers have lamented the company’s steady decline, frequent back-end changes, high prices, and user-unfriendly changes. While the company continues to improve its product offering and platform, it acknowledges some of its missteps.

A Magnum photographer says that Kanye “Ye” West used one of his photos without permission for the cover of his upcoming 12th album.

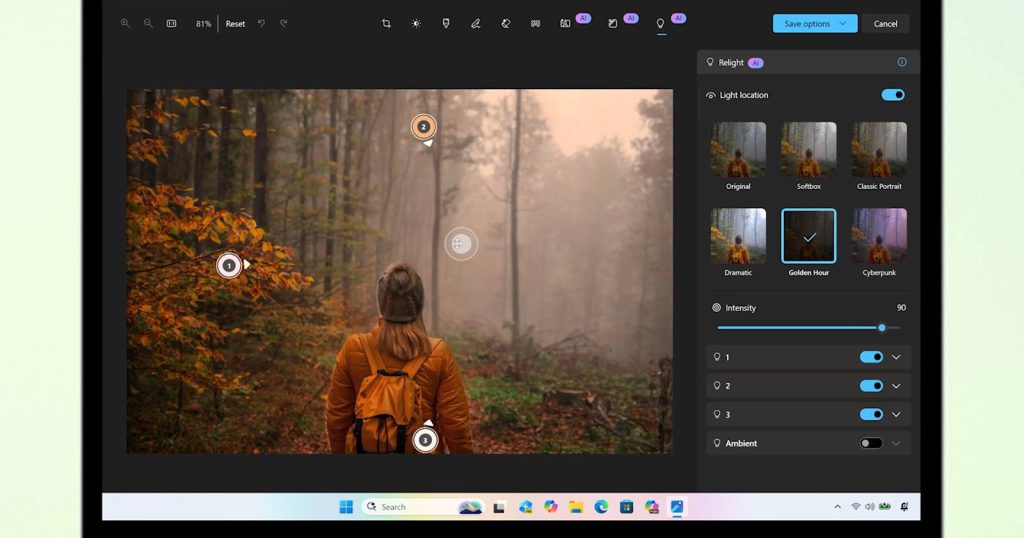
Microsoft announced that the next wave of Windows experiences includes new features for Windows 11 and Copilot+ PCs, followed by powerful new Surface AI-ready hardware. On the software side, Microsoft Photos and Paint promise impressive new AI-powered image editing features and tools.

Gordon Laing, an outstanding camera reviewer from CameraLabs and friend of PetaPixel, just published his review of the Fujifilm GFX100RF which he took to arguably one of the best locations for the compact medium format camera: Iceland.
Today’s how-to video from the Hamed Photography YouTube channel explores one of the most fundamental concepts in photography; namely the f/stop setting you choose. Hamed is a successful pro whose straightforward tutorials are designed to help elevate your skills, master important shooting techniques, and introduce you to the world of visual storytelling.
He describes today’s topic like this: “Whether you’re shooting with a DSLR, mirrorless camera, or even a smartphone with manual controls, mastering aperture will give you creative control over your images and videos.
Aperture refers to the opening in a lens through which light enters the camera and falls on the sensor. It one of the variables in the familiar Exposure triangle—alongside shutter speed and ISO— that interact to determine a correct exposure. In basic terms, “the lower the f-number the wider the aperture and the more light it allows in.”

Conversely, a smaller f-number like f/16 or f/22 means a narrower aperture with less light reaching the sensor. You may ask your why it matters whether you control exposure by changing shutter speed, ISO, or aperture, and the answer is simple: The f/stop setting you use has a significant impact on depth of field which is the area in focus in front of and behind a key subject.
Hamed illustrates how wide apertures create a shallow depth of field, “which means only a thin slice of the scene is in sharp focus”—a popular technique for wildlife photos, nature scenes, environmental portraits, and other types of images shot against distracting backgrounds.
Narrow apertures, on the other hand, produce a deeper zone of focus—thereby keeping more of the scene critically sharp. As Hamed says, “this approach is ideal for landscapes, architecture, and product photography where maximum sharpness throughout the frame is important.” He also explains how manipulating the f/stop can determine the overall mood and story of an image and is a key component for unlocking your creative potential.

Once you’re done watching head over to the Hamed Photography YouTube channel where there are many more instructional videos that demystify the photography process.
We recently shared a tutorial explaining another key camera technique that’s essential to master; namely, how to capture precisely focused photographs in difficult situations by understanding how a camera’s AF system works and then putting the Single-Point mode to work.

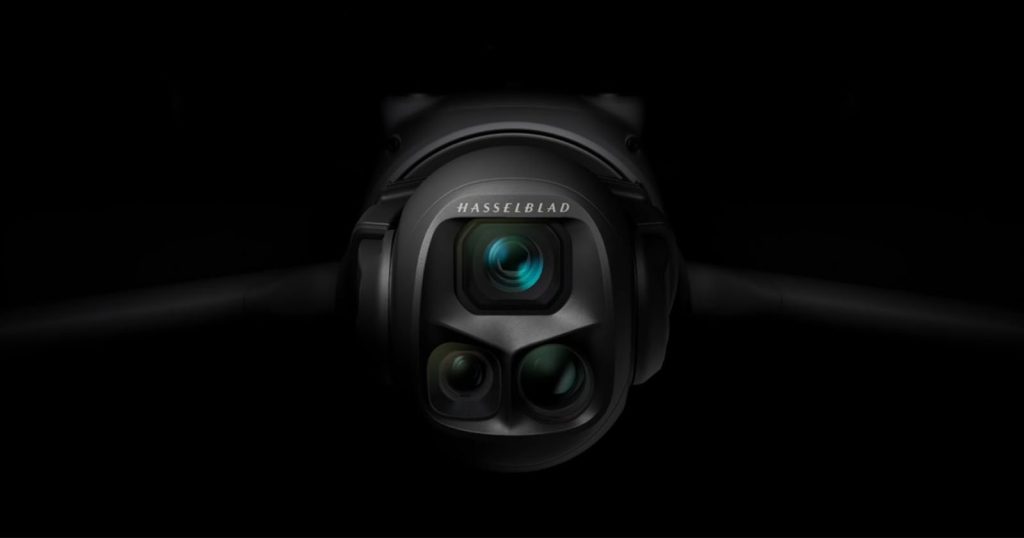
DJI launched a new teaser video earlier today for what appears to be its next drone. The short video offers little by way of concrete details, but the upcoming drone sports a Hasselblad-branded camera system and will be revealed in full next week.

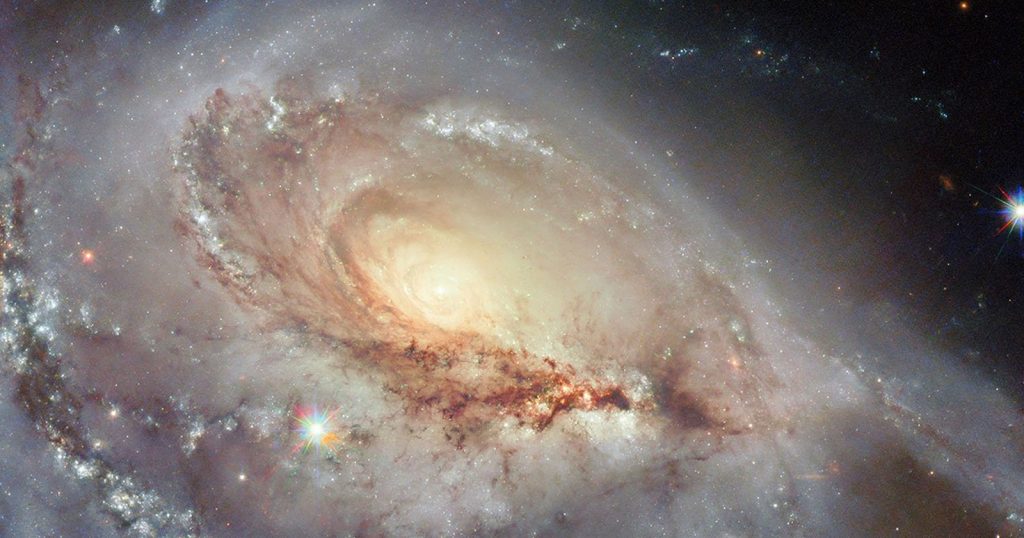
The Hubble Space Telescope’s latest image is one of its most beautiful ever. The eye-catching portrait of the peculiar spiral galaxy Arp 184, also known as NGC 1961, demonstrates the incredible depth and detail that make the 35-year-old Hubble still such an enchanting space telescope.
Abobe has provided photographers with exciting new features for removing distractions as Photoshop continues to evolve, and we’ve covered most of them in the past. But as all of us become enamored with these innovative capabilities we tend to ignored older tools that can still be very helpful.
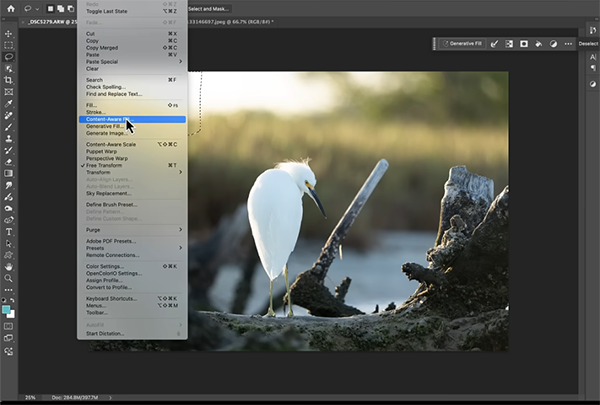
According to post-processing expert Matt Kloskowski, our old friend Content-Aware Fill falls into this category of overlooked gems, and in the next nine minutes you’ll learn when and how to use it for more efficient enhancements. He admits that he’s a big proponent of Photoshop’s new Remove tool and Generative Fill but he explains why these tools can pose several problems that are easy to solve with Content Aware Fill.
Matt’s sample image is a nice backlit photo of a beautiful backlit snowy egret perched atop a log on the shore, but he doesn’t like how the sun and sky intrude into the top of the frame. Sure, it’s possible to crop out these unwanted elements, if you’re willing to accept a tighter composition, but that’s not part of Matt’s plan because he wants to include more of the surrounding environment.

Matt first tries Generative fill to rehabilitate the top portion of the image. It’s looks OK but “pretty good” doesn’t meet his standards and you’ll you’ll see why he’s displeased with the less-than-ideal results. By zooming in on the image it becomes readily apparent that the texture of the original image doesn’t match the texture in the area that was repaired with Generative Fill. And this disparity is due to a difference in resolution.
Whether or not this is a concern depends upon your intended use for the shot, and if you just plan on sharing a compressed version on social media, nobody will ever notice. But when high-resolution is required for making big prints or other critical applications, it’s time to take a different approach that will deliver superior image quality.
This is when Content-Aware Fill comes into play, and Matt explains why “it can fix large areas much faster (and with more precision) than we could in any other way.” The remainder of the lesson is devoted to demonstrating the simple step-by-step process required for getting the job done.

Kloskowski’s popular YouTube channel is a great source of instructional how-videos about all things Adobe, so be sure to pay a visit.
And on a related note, don’t miss the tutorial we featured recently with another image-editing specialist who demonstrates five more overlooked Photoshop features that belong in your everyday post-processing workflow and how to employ them for fast-and effective enhancements.