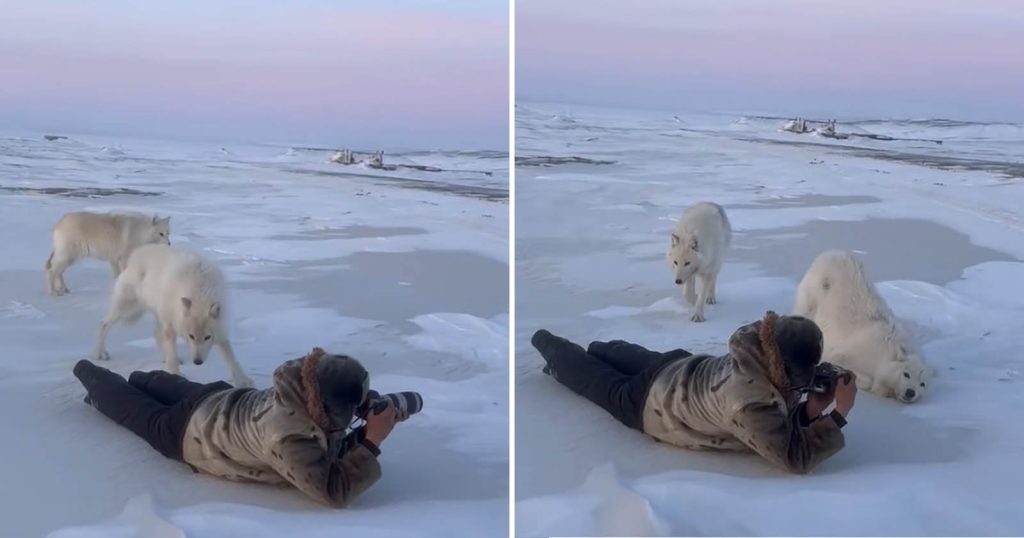

A group of wildlife photographers on an expedition in Nunavut, Canada, were recently treated to an experience of a lifetime when a pack of friendly and curious Arctic wolves approached and cozied up to them.
A group of wildlife photographers on an expedition in Nunavut, Canada, were recently treated to an experience of a lifetime when a pack of friendly and curious Arctic wolves approached and cozied up to them.

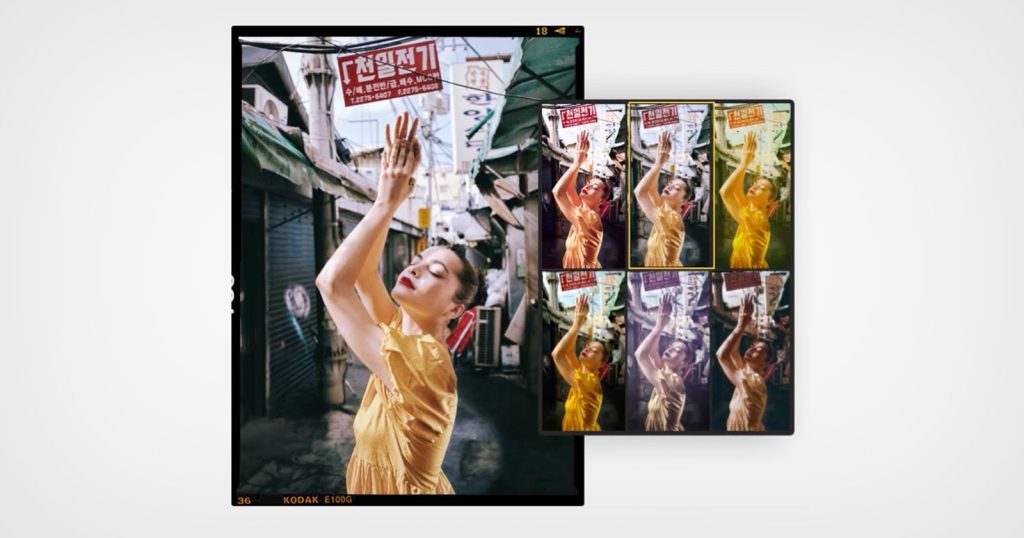
DxO has officially released Nik Collection 8, the latest version of its renowned suite of plugins for Photoshop, Lightroom Classic, and DxO’s own PhotoLab. This update introduces a completely redesigned Photoshop panel, enhanced masking tools, and significant improvements to both Silver Efex and Color Efex, offering what DxO claims is a more “dynamic editing experience.”
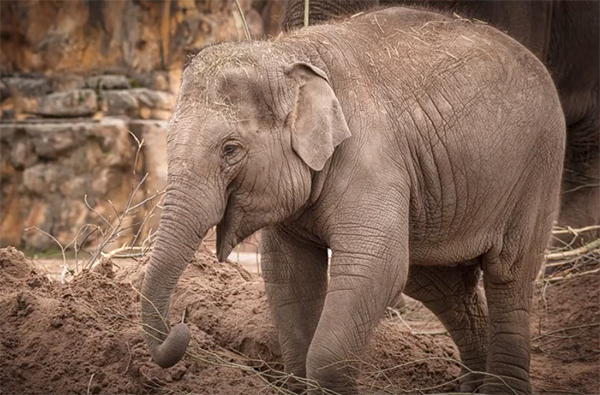
Most photographers are intrigued by the prospect of capturing exotic animals in their natural environment, but many of us lack the time or means to book a safari abroad. The next best thing is a trip to the local zoo where you can make some great shots, work on your skills, and get prepared for shooting in the field.
This behind-the-scenes tutorial with one of our favorite British bird photographers takes you on an instructional tour of the famed Chester Zoo that houses almost 60 African species and is often referred to as the UK’s best zoo. Instructor Darrel Oakden refers to himself as an amateur because he doesn’t make a living with a camera, but this portfolio is full of pro-quality images.
In barely 10 minutes Oakden illustrates how zoos offer numerous opportunities to make compelling images of a wide-range of species that you may never see in the wild, and he provides several effective techniques for creating a more natural look while minimizing the fact that your subjects are in captivity.

Thoughtful composition plays a big part in this assignment, and one powerful technique is to get in tight with a telephoto lens to isolate a majestic subject. You can also introduce a feeling of realism by framing wide shots in a way that eliminates fences and other man-made obstacles from the frame.
And just like when shooting in the field, the more time you spend observing a subject and familiarize yourself with it’s habits, the better your results will be. So slow your roll, sit down on a bench, watch the social interaction among subjects, get familiar with how they move about, and formulate a strategy. Only then is it time to pick up the camera and get to work.
One key goal is to make background as unobtrusive as possible, especially if there’s a visible enclosure behind your subject. One way to do this is by combining a long focal length with a wide aperture to throw the background out of focus and draw attention to the hero of the shot.

At the point there’s still much more to learn and Oakden walks you through other important considerations like dealing with the light and conveying the mood or power of a subject. He also offers an important warning about shooting in temperature-controlled indoor exhibits that may cause your lens to fog up when going back outdoors on warm days.
Oakden’s instructional YouTube channel offers a wealth of information for anyone interested in nature and wildlife photography, so be sure to take a look.
And even if travel photography isn’t your thing, don’t miss the comprehensive beginners guide we featured recently that covers everything necessary for shoot compelling photographs—not snapshots—during your summer excursions.
As PetaPixel reported last week, Leica’s prices are increasing in the United States thanks to tariffs. The scale of the price increase is, in some cases, extreme. Certain Leica products are nearly twice as expensive now.

Atomos CEO Jeromy Young is out, replaced by the company’s COO Peter Barber, TVB Europe reports. Barber joined Atomos in February 2024 and is best known as the co-founder of Blackmagic Design, which he left in 2017.

A 47-year-old American man was brutally impaled on a spiked metal fence at the Colosseum in Rome while scaling the barrier in an attempt to get a photo.
All photographers strive for perfectly sharp photos, and this task can often be difficult depending on the subject at hand and the situation we confronts. Consistently achieving precise focus isn’t about owning a great camera, but rather understanding how autofocus really works and knowing how to use it properly and the best settings to use.
The video below comes to us from the folks at Great Big Photography World, a YouTube channel that caters to shooters of all skill levels by sharing lessons on a wide range of topics from camera basics and composition, to post-processing and more. Our unnamed instructor explains the goal of today’s beginner-friendly episode like this: “I’ll break down everything you need to know about autofocus settings so you can finally capture sharp photos every time.
There’s a specific emphasis on your camera’s Single Point AF mode that our instructor says he personally uses most of the time and recommends to beginners and hobbyists alike. He explains his preference like this: “Unlike multi-point focus where your camera decides where to focus, single-point AF gives you full control over exactly what part of your composition is sharp. And this precision can make or break a photo.”

The video provides a quick walkthrough on when to use single-point AF, configuring the camera appropriately regardless of the brand, and how to practice with both static subjects and those in motion. You’ll also learn how to physically move your focus point within the frame, whether you’re using a rocker switch, control wheel, or a camera’s rear touchscreen LCD.
There are times when multi-point focus may be preferable with certain fast-moving subjects like birds in flight as compared to photographing a person walking past a tree. You’ll also see how to read the small square focus indictors to keep you abreast of what’s going on, “because sometimes you want full control, but other times you just need the camera to help out.”
And that’s why understanding what a camera is trying to do is the first step towards mastering the options. This is the reason our instructor teaches both methods to his students. He admits that single-point AF may feel awkward at first, “but with just a bit of practice it becomes second nature and way more accurate than letting your camera guess.”

Be sure to visit the Great Big Photography World YouTube channel after today’s lesson concludes and explore the many how-to videos available.
If you happen to be a pet owner don’t miss the tutorial we featured recently from another adept pro who demonstrates five simple techniques for capturing pixel-perfect photographs of your beloved furry friends.
Today’s quick tutorial is for those of you who’ve tried photographing on the street and were disappointed that the images you captured looked nothing like the compelling scenes you witnessed through the viewfinder. We’re going to fix that today.
Instructor Hans-Joachim Brucherseifer is very sympathetic and he explains the difficulties like this: “Street photography is a true test of skill and intuition. Often you only get one shot (no second chances), you can’t stage anything, and lighting is always unpredictable. In less than four minutes he provides several of his secrets for overcoming these uncertainties.
Hans is a German pro who says he’s a photographer by day and a magician at night who shoots everything from epic landscapes to imitate portraits. He’s also a popular instructor, and his straightforward imaging tutorials are packed with photo tips, unique techniques, and a whole lot of passion.

Today’s street photography primer covers everything from choosing the right lens, making the most of natural light, and achieving precise focus. Being prepared for the unexpected is also part of the game, as is easing your qualms about approaching strangers to politely request an impromptu portrait.
Hans begins with the latter and says he strives to tells a story with his images by capturing real-life situations, and why this often means photographing people within their personal space. As he says, “this requires technical skill and a deep sense of empathy and respect.” He follows up by revealing two ways to photograph pedestrians you don’t know.
In basic terms, you can either act as a fly on the wall, capturing the scene unnoticed, or “be the hornet on the eye directly.” Hans says his often shoots unaware subjects from behind, before approaching them, presenting the photos on the LCD, and suggesting an environmental portrait or two. Most times couples or individuals will readily agree, especially if you offer to send them copies.

Hans then moves on to gear and the focal lengths he recommends for different scenes and situations. You can view a complete list of the equipment he prefers in the description beneath the video. Once you’re properly armed it’s time to scrutinize the light and understand how to create natural looking exposures with perfectly balanced tones.
The lesson concludes with a discussion of how to use your experience to anticipate the unexpected and a few random final thoughts for improving your photos of the urban landscape. Be sure to check out Hans’ instructional YouTube channel where there’s much more to learn.
And don’t miss the tutorial we featured recently with another accomplished shooter who demonstrates how he employs creative cropping to significantly heighten the impact of every photograph that he shoots indoors or out.

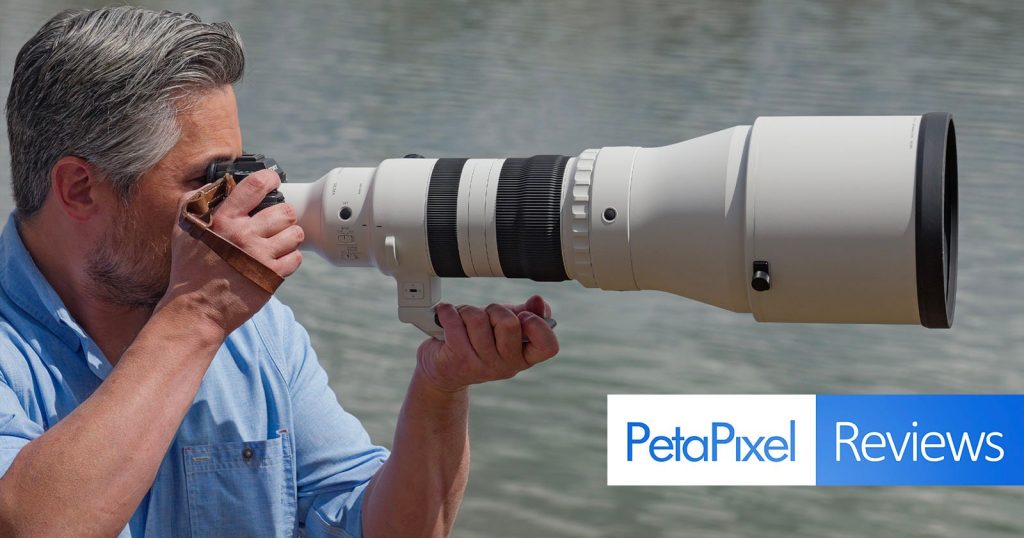
Professional telephoto lenses made specifically for wildlife and sports tend to be the most expensive money can buy. They push the envelope of lens technology, not to mention size and weight. What if I told you that Sigma made a lens that delivers the same f/4 aperture combined with a more versatile zoom range but is also only $6,000, substantially less money than the competition? It sounds too good to be true.
There’s a common goal among all Photoshop users, whether they’re just getting started or a post-processing expert; namely, making the most of all the appropriate tools so your enhancements look great and are accomplished quickly with a minimum of complexity.
One way to facilitate this task is to understand less-familiar or secondary features that are often overlooked, and this tutorial from The Photoshop Training Channel demonstrates a handful of techniques that can make a big difference in results, accelerate the process, and deserve a prominent place in your everyday Photoshop workflow.
Instructor Jesus Ramirez is an expert at all things Adobe who has worked with some of the biggest publications and software makers during his successful 20-year professional career. Shutterbug readers appreciate his “concise fluff-free” tutorials that span the gamut from image-manipulation, compositing and retouching, to special effects and much more.

He begins with a trick for turning any PSD file into a Photoshop template by simply adding the letter “T” to the end of the file extension. Then when you open the PSDT file Photoshop automatically creates a new, untitled document “which means this is a completely fresh file and you can’t accidently override the original.”
Ramirez insists that another of Photoshop’s best hidden features is that you can use the Eyedropper tool to accurately sample colors from any outside application like a page on your Internet browser. It’s as easy as this: Simply minimize the application frame, click inside the canvas, and drag out. You’ll notice that as you drag over the browser Photoshop instantly selects those colors.
In other words, “I’ll hover over the blue and that becomes Photoshop’s foreground color. I can now expand the application frame and use the Brush tool to paint in blue.” Ramirez demonstrates several other helpful tricks for dealing with fonts, saving and applying character styles, accessing hidden brushes, and downloading additional brushes.

You’ll also learn how to expand your creative arsenal by gaining access to Photoshop’s legacy shapes and styles. Be sure to take a look at Ramirez’ instructional YouTube channel where there are many more post-processing tips and techniques to be found.
We also encourage you to watch a tutorial we featured with another image-editing expert who demonstrates how to streamline your workspace with a frequently ignored masking trick that’s available in Lightroom, Photoshop, and Adobe Camera Raw (ACR).