The post How to Avoid and Reduce Noise in Your Photos (A Practical Guide) appeared first on Digital Photography School. It was authored by Barry J Brady.

We’ve all seen it in our images: that uneven grainy look that makes even otherwise outstanding photos look unappealing. But how can you avoid noise? And, in cases where it’s unavoidable, how do you reduce noise in photos?
Fortunately, dealing with noise is easier than you might realize, even if you don’t own a $5000+ camera with breathtaking low-light capabilities. In this article, I’m going to share plenty of tips and tricks for both preventing and removing noise, including:
- What causes image noise
- Five simple ways to stop noise from ever appearing in your images
- A noise reduction workflow you can use to reduce noise in Lightroom and Adobe Camera Raw
Sound good? Let’s dive right in, starting with the important first question:
What is noise?
In the context of digital photography, noise is aberrant pixels that appear in your image files.
In other words, noise is made up of pixels not correctly representing the color or exposure of the scene. If you photograph a dark blue wall, and in certain portions of the file, you can see speckles of white, red, or green, noise is probably the culprit!
You’re likely familiar with another type of noise: the static that you sometimes hear when you’re tuning a radio or watching TV. That static is caused by signal distortion or interference; it’s not deliberately included as part of the broadcast but is instead a result of the broadcasting process.
Technically, almost every image file contains some level of noise, even if it’s invisible to the naked eye. If you open an apparently noise-free photo and zoom in to 400%, for instance, you’ll probably start to see aberrations in the pixels, even if they’re slight. However, in this article, I’ve focused my discussion on significant noise (i.e., noise that’s visible or that threatens to become visible with small adjustments in post-processing).
Why does noise happen?
Noise is introduced when you shoot a long-exposure image or use a high ISO setting on your camera.
(What counts as a high ISO setting? That depends on your camera model, but these days, most cameras start producing noisy files around ISO 1600 or 3200.)
Does that mean you should never do long exposures or go over ISO 100? No! There are times you may need – or even want – to use long exposures or raise the ISO. Landscape photographers, event photographers, and wildlife photographers shoot in low light all the time, which requires long exposures and/or a high ISO.
At the same time, there are simple ways to avoid too much noise in your photos, even when using the above techniques, which I’ll discuss in the next section:
5 ways to reduce noise in-camera
Below, I share the five methods for minimizing noise while out shooting.
Not every method will apply to every situation, which is why it pays to be familiar with all of them – and to carefully choose the right method for your particular shot.
1. Shoot at lower ISO settings
Yes, we’re starting with the most obvious method. But photographers often push their ISO too high, too fast, leading to bad image quality.
Now, if your camera includes relatively new sensor technology, the ISO functionality will be great. You shouldn’t see too much noise creeping into your images, even up to ISO 3200. However, there might still be some noise at the higher ISO numbers, such as ISO 6400, ISO 12800, and beyond.
So don’t raise your ISO with abandon. Instead, be aware of your exposure, and recognize that shooting at a high ISO will produce more noise in your images. Boost your ISO if necessary, but consider other options before dialing in ISO 12800.
Here are a few items to think about before increasing the ISO:
- Open your aperture to its widest setting (e.g., f/2.8)
- If you are shooting in low light, use a tripod and drop your shutter speed
- If you are shooting a smaller subject (e.g., a person), use a flash
Each of these strategies will help you get a nice, bright exposure – without unnecessarily raising the ISO.
Of course, if your shots are still turning out dark, then you will need to push the ISO up higher. I’d recommend doing some test shots to find out your camera’s ISO capabilities and at what point the ISO settings start to really degrade image quality.
For many years, I shot on a Nikon D80, and I knew that anything above ISO 500 was really difficult to use. Noise at ISO 640 and beyond became difficult to remove. And if I was able to successfully remove it, the whole image looked like a watercolor painting thanks to the noise reduction process. So I worked within my constraints.
2. Shoot in RAW format
Does the idea of shooting in RAW intimidate you? It shouldn’t! RAW is a great way to get the best out of your images, so be sure to use it.
You don’t have to shoot RAW all the time. But when you notice that the light is becoming a little too dark, switch over to RAW.
Why is this so important?
JPEGs come with compression – a process during which noise becomes baked into your images. So removing noise in post-production becomes really tough (as does increasing exposure, which is often important in high-ISO situations).
3. Expose correctly from the start
Boosting a too-dark exposure will reveal noise – which is why it’s essential that you get your exposures right from the very beginning.
When out shooting, I highly recommend checking your camera’s LCD – including the histogram – to make sure you’ve nailed the exposure.
And don’t be afraid to take several shots at different exposures, especially if you’re dealing with a tricky scene; better to be safe than sorry!
Also, the higher your ISO, the more unforgiving the file. In other words: If you’re using a high ISO, you had better get the exposure right, because boosting an underexposed high-ISO image will result in a noisy mess.
(Of course, don’t overexpose, either. While overexposure won’t cause problems with noise, it will obliterate detail, which is never a good thing.)
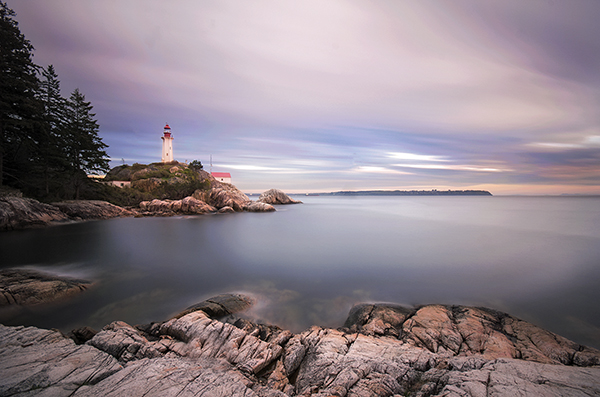
4. Be careful when doing long exposures
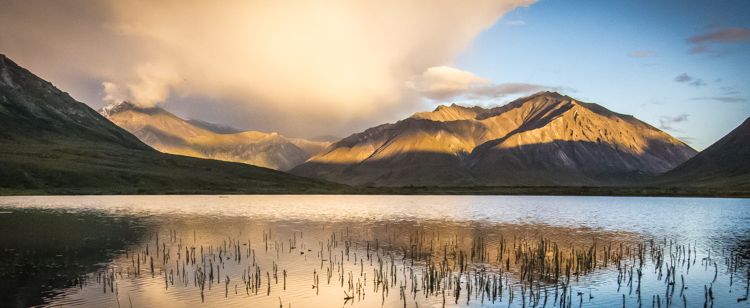
Long exposures produce some of the most dramatic images.
But if the exposure is too long, the camera sensor may heat up, causing unwanted noise.
Don’t let this stop you from doing long exposures – if you love long exposures, then do long exposures – just be aware of how your camera handles the long exposure time.
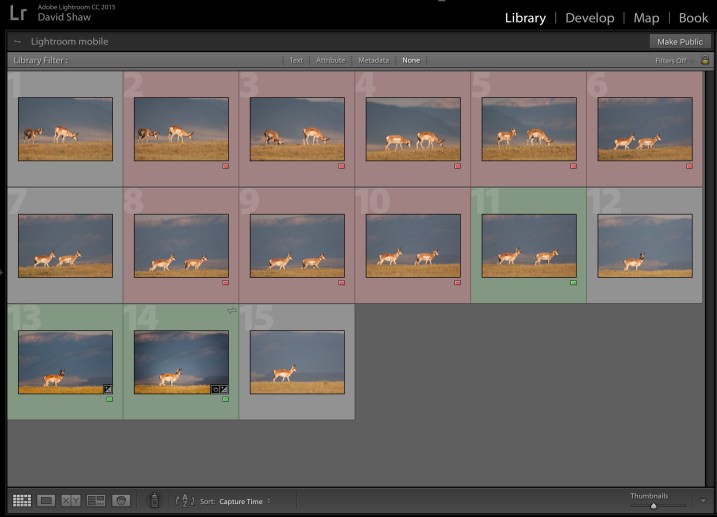
In fact, you might consider shooting a series of long exposures, then checking each file on your computer for noise.
Then, once you’ve determined your camera’s limitations, make sure you don’t set your shutter speed for longer than your camera can handle.
The key point here is to know the limits of your gear and to shoot within those limits. You’ll end up with great images and have an easy time when editing.
5. Use in-camera noise reduction
Most cameras offer a function called Long Exposure Noise Reduction, and if you’re doing long exposures, it’s a good idea to turn it on.
Why?
Well, as discussed above, long exposure photos are especially prone to noise. A long exposure noise reduction option is designed to counteract this issue – by taking a second shot after the first, then using the noise profile of the second image to subtract noise from the first.
Long exposure noise reduction comes with a serious drawback, though: it takes time, usually as long as the original exposure. So if you use a 30-second shutter speed, the camera will take an additional 30 seconds to get rid of the noise. And if you shoot for an hour, you’ll need another hour to reduce the noise, which is an annoyingly long time to wait!
So yes, it may be impractical if you are doing 10-minute shots. But for medium-length long exposures, it’s often worth doing.
(And if you do have the timed, do it on the very long exposures too, as it can dramatically improve the image quality.)

Reducing noise in Lightroom or Adobe Camera Raw
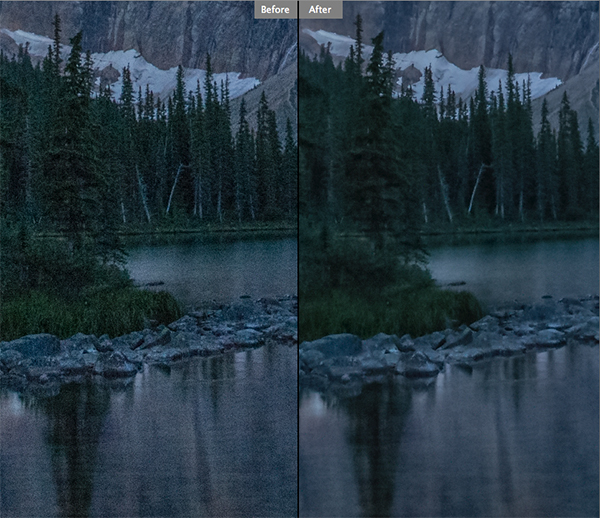
Even with the best techniques, you’ll still end up with noise in your photos – at least on occasion.
This is where post-processing noise reduction techniques come in handy!
Different software offers different noise reduction options, and I’m going to focus on two popular (and near-identical) programs from Adobe: Lightroom Classic and Adobe Camera Raw.
Below, I share my recommended workflow, but as you follow along, note that you’ll be able to use very similar methods in other programs!
Also note that you’ll generally want to complete all your other edits before reducing noise. This is because exposure adjustments, as well as sharpening adjustments, can make noise more visible. If you start by reducing noise and then apply a series of edits that amplify any existing noise, you’ll be forced to reduce noise a second time. This is inefficient, and it can also degrade image quality (since the noise reduction process does involve some loss of detail). So once you’ve done your basic edits, here’s how to proceed:
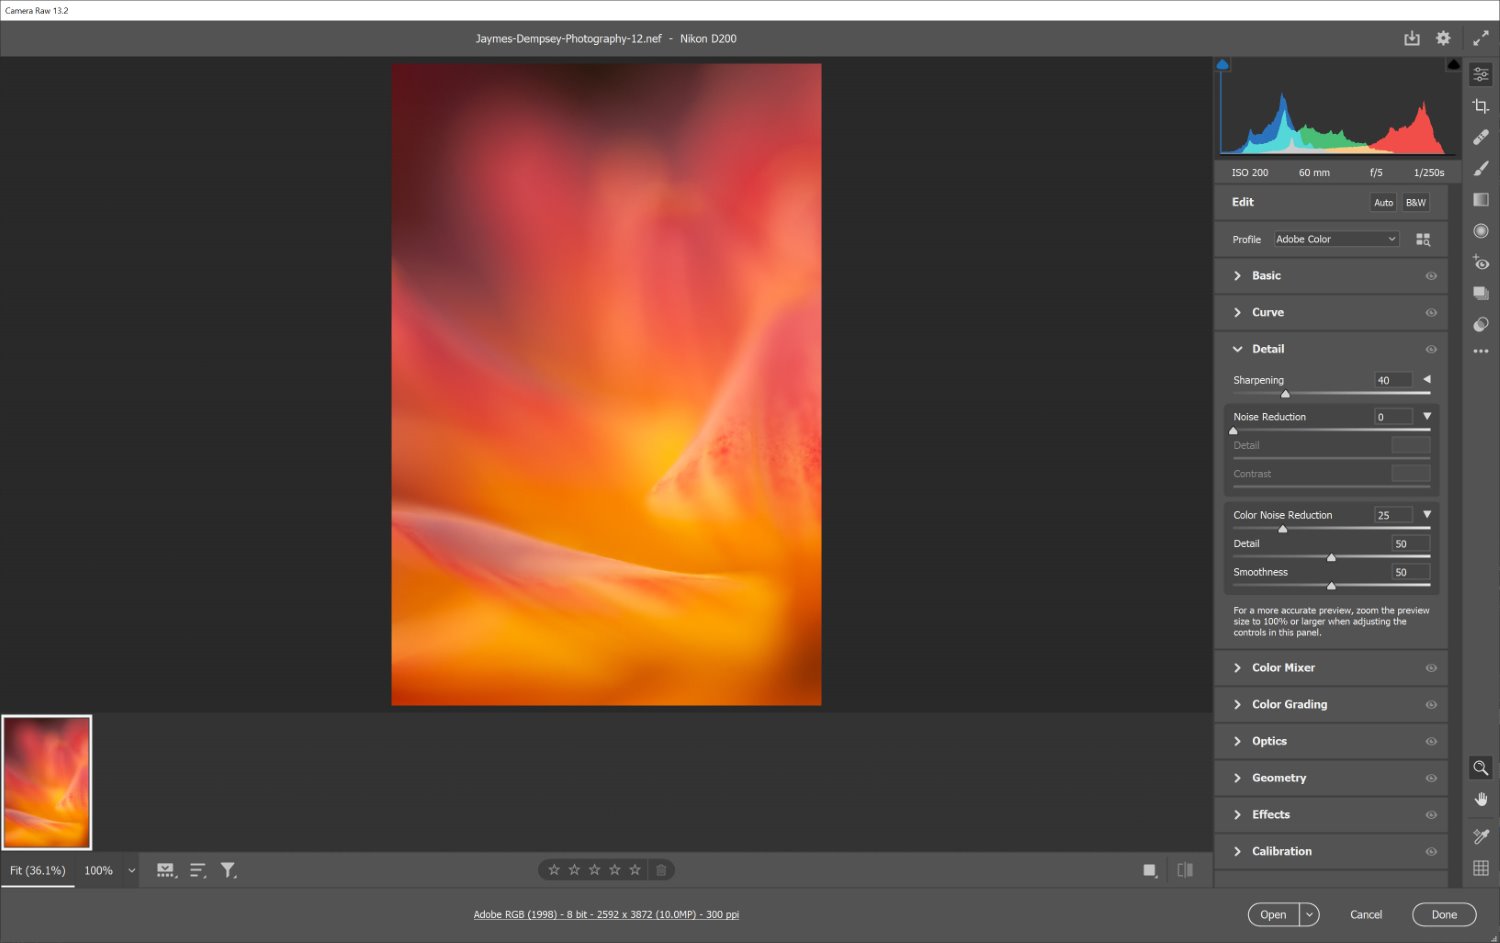
Step 1: Open your image and view it at 100 percent
Start by opening your image in Lightroom or Photoshop.
Note that RAW images opened in Photoshop will first go through Adobe Camera Raw, which is what you want. Again, remember that the controls in Adobe Camera Raw and Lightroom are almost identical, so most of the instructions are applicable to both ACR and Lightroom users.
I recommend viewing your image full screen, then zooming into 100 percent. The goal is to look for noise; after all, not all images require noise reduction.
If you don’t see any noise, then there’s no need to apply any noise reduction. However, if you do notice some noise, and you feel it’s harming the image quality, proceed with the next step:
Step 1.5: Try the Denoise button (optional)
Adobe recently added an AI-powered denoise feature to Lightroom. It works by analyzing your selected image for noise; then it creates a DNG copy of your file that has been tweaked to remove noise while retaining detail.
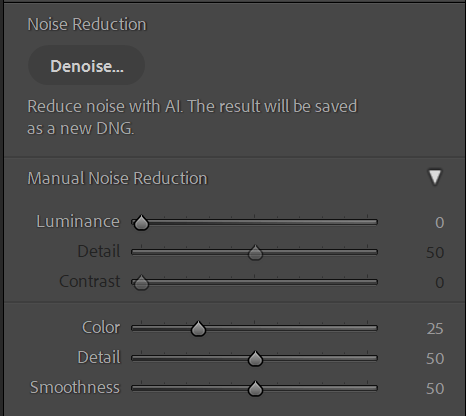
Importantly, the Denoise button is only available in Lightroom, not Adobe Camera Raw. So if you’re an ACR user, you’ll want to skip straight to the next step. If you’re a Lightroom user, however, you’ll find the AI Denoise option in the Detail panel:
If you’re looking to reduce noise in your photos and you don’t mind waiting around, hitting the Denoise button can often do the trick. Once you press the button, you’ll see this dialog box, which includes a few basic settings:
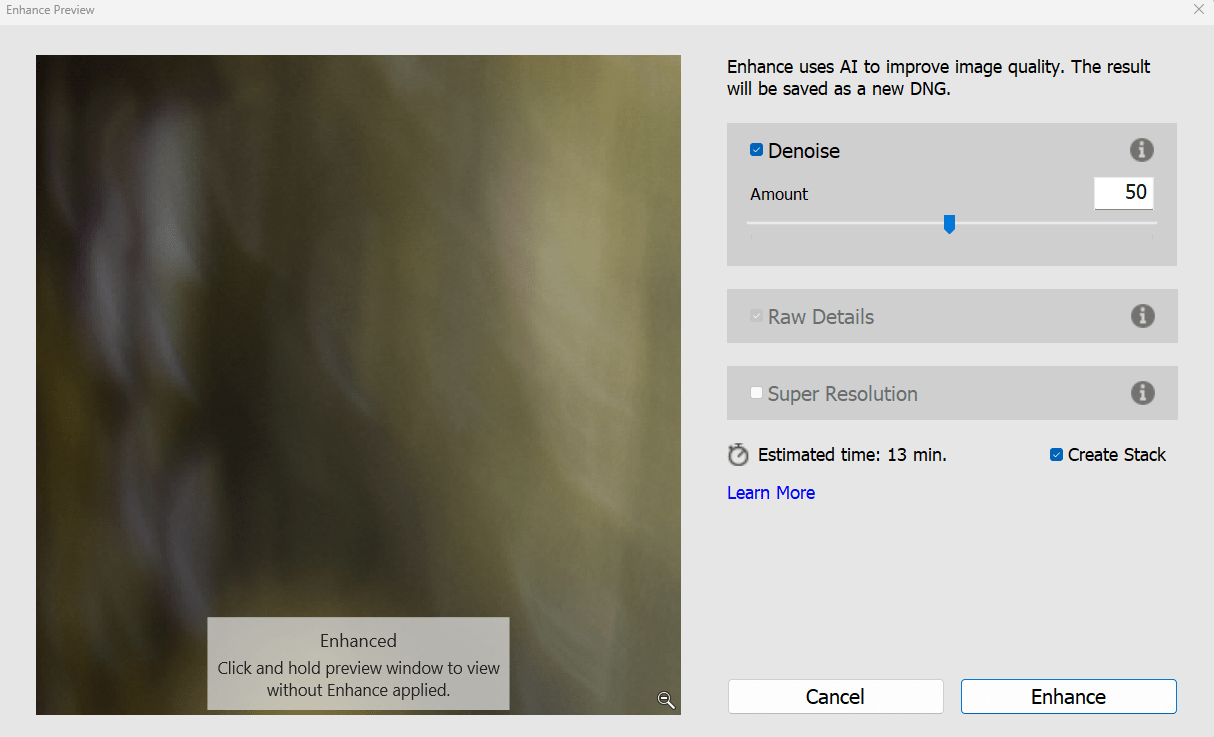
I like to leave the Denoise Amount slider at its default value, though if the zoomed-in preview on the left looks either too noisy or too smooth, I’ll adjust the slider accordingly.
In Lightroom, I also recommend making sure the Create Stack option is checked. This tells the program to group the noise-reduced file with the original file for easy reference later.
Finally, hit Enhance, and wait for Lightroom’s AI to process your file.
In my experience, this approach does a reasonably good job of reducing noise, but it comes with a huge downside:
It takes forever to run (unless you own a state-of-the-art computer, at least).
If you look carefully at the screenshot I included above, Lightroom estimates that the noise reduction process will take a whopping 13 minutes to complete. For some folks, that won’t be a problem, but for others – such as those who edit high volumes of photos for clients – it’s just not worth the wait.
Regardless, you can always proceed with the manual noise reduction steps I discuss below:
Step 2: Adjust the Luminance slider
The Luminance slider reduces luminance noise (i.e., noise resulting from over- or underexposed pixels).
And many, many high-ISO images suffer from excessive luminance noise.
So zoom in to 100 percent, then boost the Luminance slider until the noise starts to disappear.
Don’t go too far, however,
Step 3: Fine-tune your result with the Luminance Detail and Luminance Contrast sliders
The Luminance Detail and Luminance Contrast sliders control the amount of detail and contrast preserved in your photos following luminance noise reduction.
You see, noise reduction smooths out noisy pixels, which automatically reduces detail and contrast. But by boosting these sliders, you’ll retain detail and contrast.
As you’d expect, the sliders do come with a drawback:
When you increase the values, you decrease the strength of the noise reduction. So while you’ll end up with a sharper image, you’ll also see more noise.
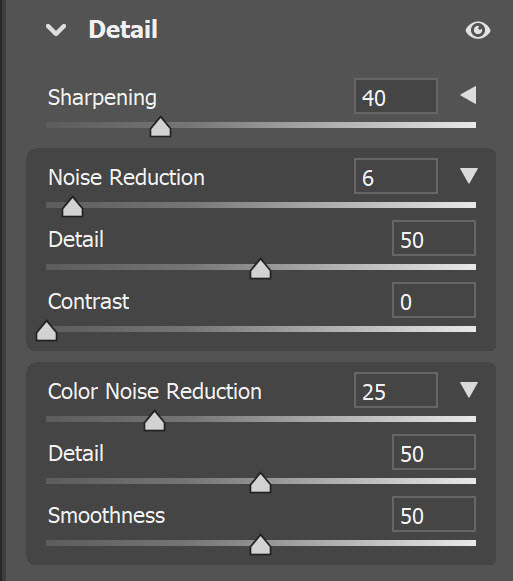
Step 4: Adjust the Color slider
The Color slider reduces color noise – which is the second type of noise you’ll find in your photos (often in the underexposed shadow areas).
So boost the Color noise slider, and zoom into 100 percent to see its effects.
Step 5: Fine-tune your result with the Color Detail and Color Smoothness sliders
As with luminance noise reduction (above), you can further adjust your image with the Color Detail and Color Smoothness sliders.
Want more detail in your photo? Boost the Color Detail slider. Higher values will protect thin, detailed color edges, but can also result in color speckles. Lower values remove color speckles but can result in color bleeding.
Want to keep colors nice and smooth? Boost the Color Smoothness slider.
And you’re done!
A final note on noise reduction
While I wish I could give you standard, one-size-fits-all settings for noise reduction, it just doesn’t work that way. Every image is different, so you’ll need to slide each adjustment around until you get your desired result.
I tend to increase Luminance and Color to about 50, then work from there. I slide each option up and down, carefully watching how it affects the image while zoomed in to 100 percent.
Then, after each adjustment, I zoom out to see the effect it has on the overall image. And if I’m happy with an adjustment, I move onto the next slider.
Is the process a little tedious? Sure. But if done properly, you’ll eliminate most of the unsightly noise in just about any image.
Practice is also important here, so try this on as many images as you can. Pretty soon, you’ll be able to predict the effect of each change.
How to avoid and reduce noise in your photos: final words
Now that you’ve finished this article, you know that avoiding and reducing noise shouldn’t be too complicated. Just follow the steps I’ve given, and your images will turn out great!
While it’s best to avoid noise from the get-go, reducing noise during post-processing is definitely a solid option. So focus on a two-pronged approach: do your best to avoid noise, and then clean up any remaining noise with software.
Now over to you:
Do you have any other tips for noise reduction and removal? Share your thoughts in the comments below!
The post How to Avoid and Reduce Noise in Your Photos (A Practical Guide) appeared first on Digital Photography School. It was authored by Barry J Brady.